Category: Recent Work
Photos taken recently.
Professional Image Rights and Usage

So you’ve decided to hire a professional photographer and stop using your niece or nephew or that friend who owns a “nice” camera. You’ll need to understand a few things and I’m here to help. You may not like what I’m about to tell you but, Pro’s cost money, they earn all or part of their living by taking pictures. A professional has invested ten’s of thousands of dollars in equipment, and that’s just what they have in the bag today. It doesn’t take into account the other gear that has become obsolete or just worn out over the course of many years. A professional camera body today costs anywhere between about $3500 and $8000 with no lens, no lighting equipment, nothing else just the body. A single professional grade lens will run another $1200 on the very low end to another $2500-$8000 on the higher end depending on whether it’s a 35mm format or a medium format system. A middle-of-the road lighting setup will also run about $8-10,000. The very top level professionals working in commercial photography often spend in excess of $50000 on a single camera body, digital back and lens and perhaps another 30K or more on lighting. Just remember, a camera can’t take a picture until the photographer picks it up and makes the images. A camera is a tool – the photograph is made by the photographer. If you own or run a mid-market or small business keep reading. I’m going to try and explain the concept of “VALUE” and “LICENSING” of an image, and by value I don’t mean what you paid to have it created. I often encounter people who don’t understand the concept of the value of an image and the subsequent licensing for its use. An image shot for commercial purposes might be intended for use on a website, Point of Sale (POS) display or maybe even a billboard. The different ways in which an image will be used are negotiated with the photographer when you hire him or her to create images for you. This would be a rights-managed image. Usage can take on several forms. Billboards, the sides of city bus, or where it stops are often prime areas for advertising using photography. These types of uses are referred to as Out of Home (OOH), meaning people only see them when they are outside and generally away from their home. There is also a type of usage for print meaning magazines, newspapers, etc. Social media typically has its own call out for usage these days. Usage on your personal or business website is not the same usage as usage for advertising using those images on the web. There is a lot of good information online about usage and licensing photographs. At the end of this post I’ll provide some reference links for your continuing education. All images are subject to copyright laws and unless the rights have been expressly granted to another entity, they remain the property of the photographer. I’ll say it again, the copyright of an image is owned by the photographer. In the U.S. this concept is actually rooted in our Constitution in Article 1, Section 8, Clause 8 and it’s the basis for our copyright and patent laws. There is a ton of information online about this and there is an entire government agency and a horde of attorney’s that specialize in copyright law so I’m not going to try and explain anything relating to the law.
Now that you understand you don’t own an image just because you hired a photographer to create it, bear with me for a minute while we explore the concept of “VALUE” using an analogy because this is very important! Let’s say you don’t own a vehicle but you need to drive from Dallas to New York and after you get to NY, you no longer need a vehicle. Are you going to go buy a new vehicle for a 2000 mile trip when you have no further need for it after the trip is complete? Probably not, instead you’re more likely to rent it for a few days and turn it back in at the rental agency. If you did decide to buy it would you expect to pay a lot more money? Of course you would, because the vehicle will still have value to you even after you finished the trip. The value you purchased might be transferred to a new owner or you could just park it and pay for a space to keep it in NY knowing that in a year or two you might need it again or you might not. The sensible option is to rent transportation for the 3 or 4 days it takes to complete the drive. You’ve just saved a ton of money and you got exactly what you needed, nothing more. But wait! We started off simply stating that we needed to drive from Dallas to NY. Well what you left out was that you needed to move your entire household and all your belongings. You only rented an economy car for $100 a day. Again, would you expect to pay more for a 22 foot truck capable of moving everything in one trip? Yes, because the truck has more value to you than the car does; you need the truck. The same is true when you want to use a photograph. If you’re going to use it on your website it has a certain value. How many visits does your website get in a year? Let’s say a million, so a million people will see the image. That’s Great! Now you say you want to use the image on billboards in every major U.S. city across the country because you’re selling Texas flags and everyone who sees the billboard is your potential customer. Now instead of a million people seeing your flags for sale there are hundreds of millions of people seeing the billboards. Would you say that image on the billboard has more value because of how it’s being used? Does the truck have more value than the car if you’re moving across country? Say, “Yes” even begrudgingly! Expect to pay for the value the thing provides. When you hire a professional photographer for commercial purposes, you should expect to pay to use the image for your specified purpose for a specified period of time, just like you rented the car or the truck for the time it takes to drive from Dallas to NY. There are some great resources out there for an explanation of terms that you should hear if you’re talking to a professional. Terms like creative fees, exclusive license, non-exclusive license, commercial use, editorial use, and retail (like if you purchase a print to hang on the wall in your castle). If the photographer is not discussing usage and licensing with you then I suggest that you consider finding another photographer because you could easily learn a hard and expensive lesson on copyrights. Any use of a photograph not specifically granted in a license or contract is retained by the photographer. Just as you wouldn’t expect to go pick up your truck when you only rented the car, don’t expect to use the image on billboards when you only paid for use on a website.
Set the Nodal Point for Shooting Panoramic Images
How-To for selected Nikon and Hasselblad Lenses
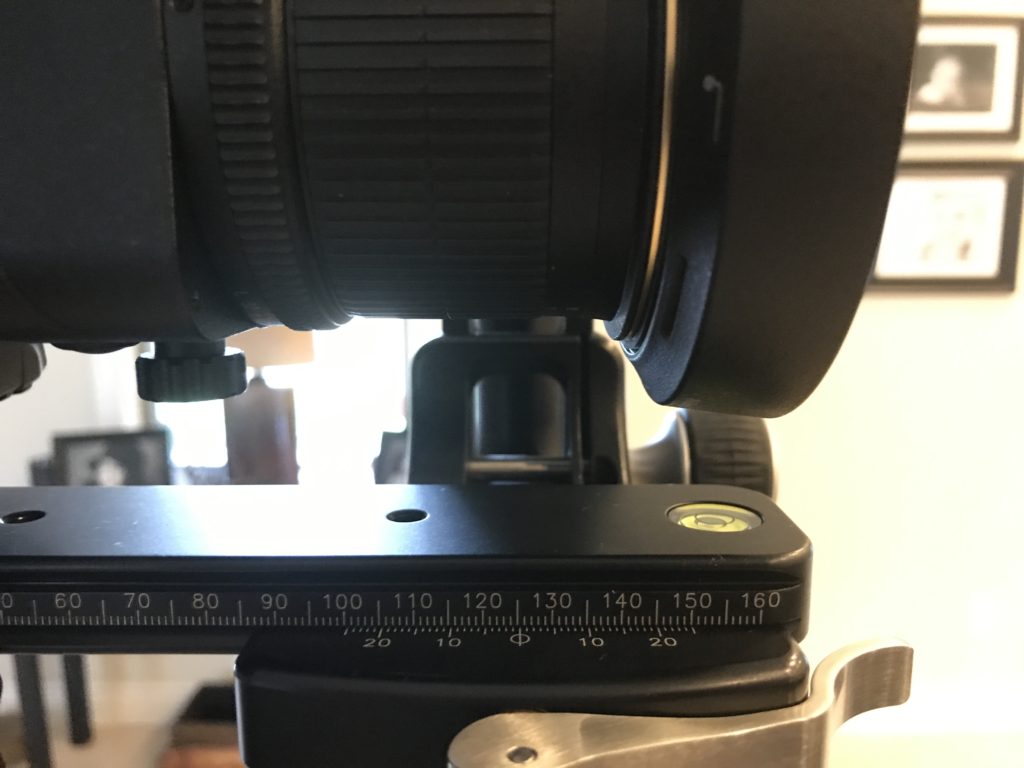
Setting the nodal point for a camera lens is relatively easy once you understand what’s going on. This post describes how to set the nodal point for any lens but the settings at the end are for Nikons. Above is my setup for shooting panoramic images. Here is a great deal on this setup just below.
The pano gimbal alone isn’t enough because you have to be able to slide the lens back and forth in the rail clamp to find the lens nodal point. At the bottom of this post you’ll find a table with nodal point setting for select Nikon and Hasselblad lenses using the RRS gimbal and nodal slider.
Start off with everything leveled. The RRS gear and most quality tripods come with a built in spirit level so that’s pretty easy but it’s easier if you start out someplace that is already level, like inside your home. Next you want to make sure the nodal rail and camera clamp is centered over the center of the tripod. For the RRS gear that amounted to dropping a plum bob down a center hole in the rail and aligning that with the center of the pano head marking. This gave a setting of 127mm as shown below.

Next attach your camera to the nodal slider and clamp it into the cradle so the whole shebang has the camera mounted securely. Here is where things get interesting. You need to have two reference points one near and one far to set the nodal point. You don’t need something miles away and in fact it might be easier if they are not. There was probably 10-15 ft between my two reference points. I found it easier to align something pointy (near) with a vertical line (far). If your nodal point is correct the alignment of the two points will not shift left or right as you pan the camera on the tripod.
I suggest setting the camera in live view and focus somewhere in between the two objects so you can see how they align the best. Turn your grid on in live view and put the center hash on the center of your near object and use the + button on your camera body to zoom the display in so you can see exactly what you’re doing. Align the near object with the vertical line that is the far object. I used the scallops on the kitchen cabinets. It might take a little fiddling moving the camera and tripod around until you have alignment of all 3 objects. Your camera, the near object and the far object all need to align to start.
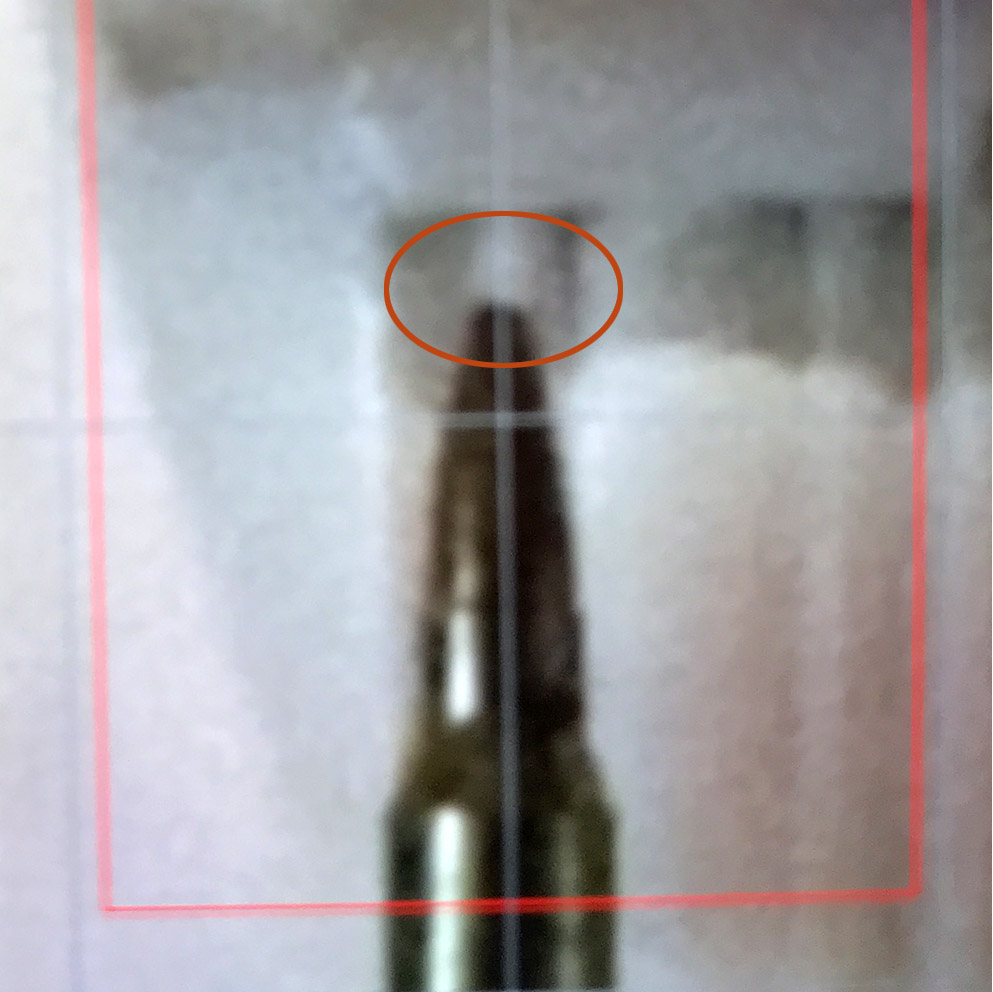
Once everything lines up you’re ready to begin the process of actually finding the nodal point. With the display zoomed all the way out pan the camera until the near object is in the very left or right side of the display. Now zoom in on the near object again using the + sign on the back of your camera to zoom the live view. Next loosen the camera clamp slightly so you can slide the nodal rail back and forth until the near and far object are in the same alignment as when the camera was positioned in the center of the frame and re-clamp the nodal slider so everything is secure again. Be really careful if you’re using quick release clamps that your camera doesn’t go crashing to the ground. The image below shows the alignment I used with the display zoomed in nearly as far as I could zoom. The area circled in red is what’s important. With the camera panned to show the objects in the extreme left or right of the display, move the nodal slider in/out until the objects align exactly as they did when the display was centered. The near object should not appear to shift left or right in relation to the far reference object.
Re-clamp your camera and take note of the measurement. The RRS gear has convenient markings in millimeters to make your adjustments repeatable.
The image below shows an improper nodal point setting as the reference points are no longer aligned with the camera panned far left or right. Move your nodal slider in/out until the two objects align exactly as they did in the first image.

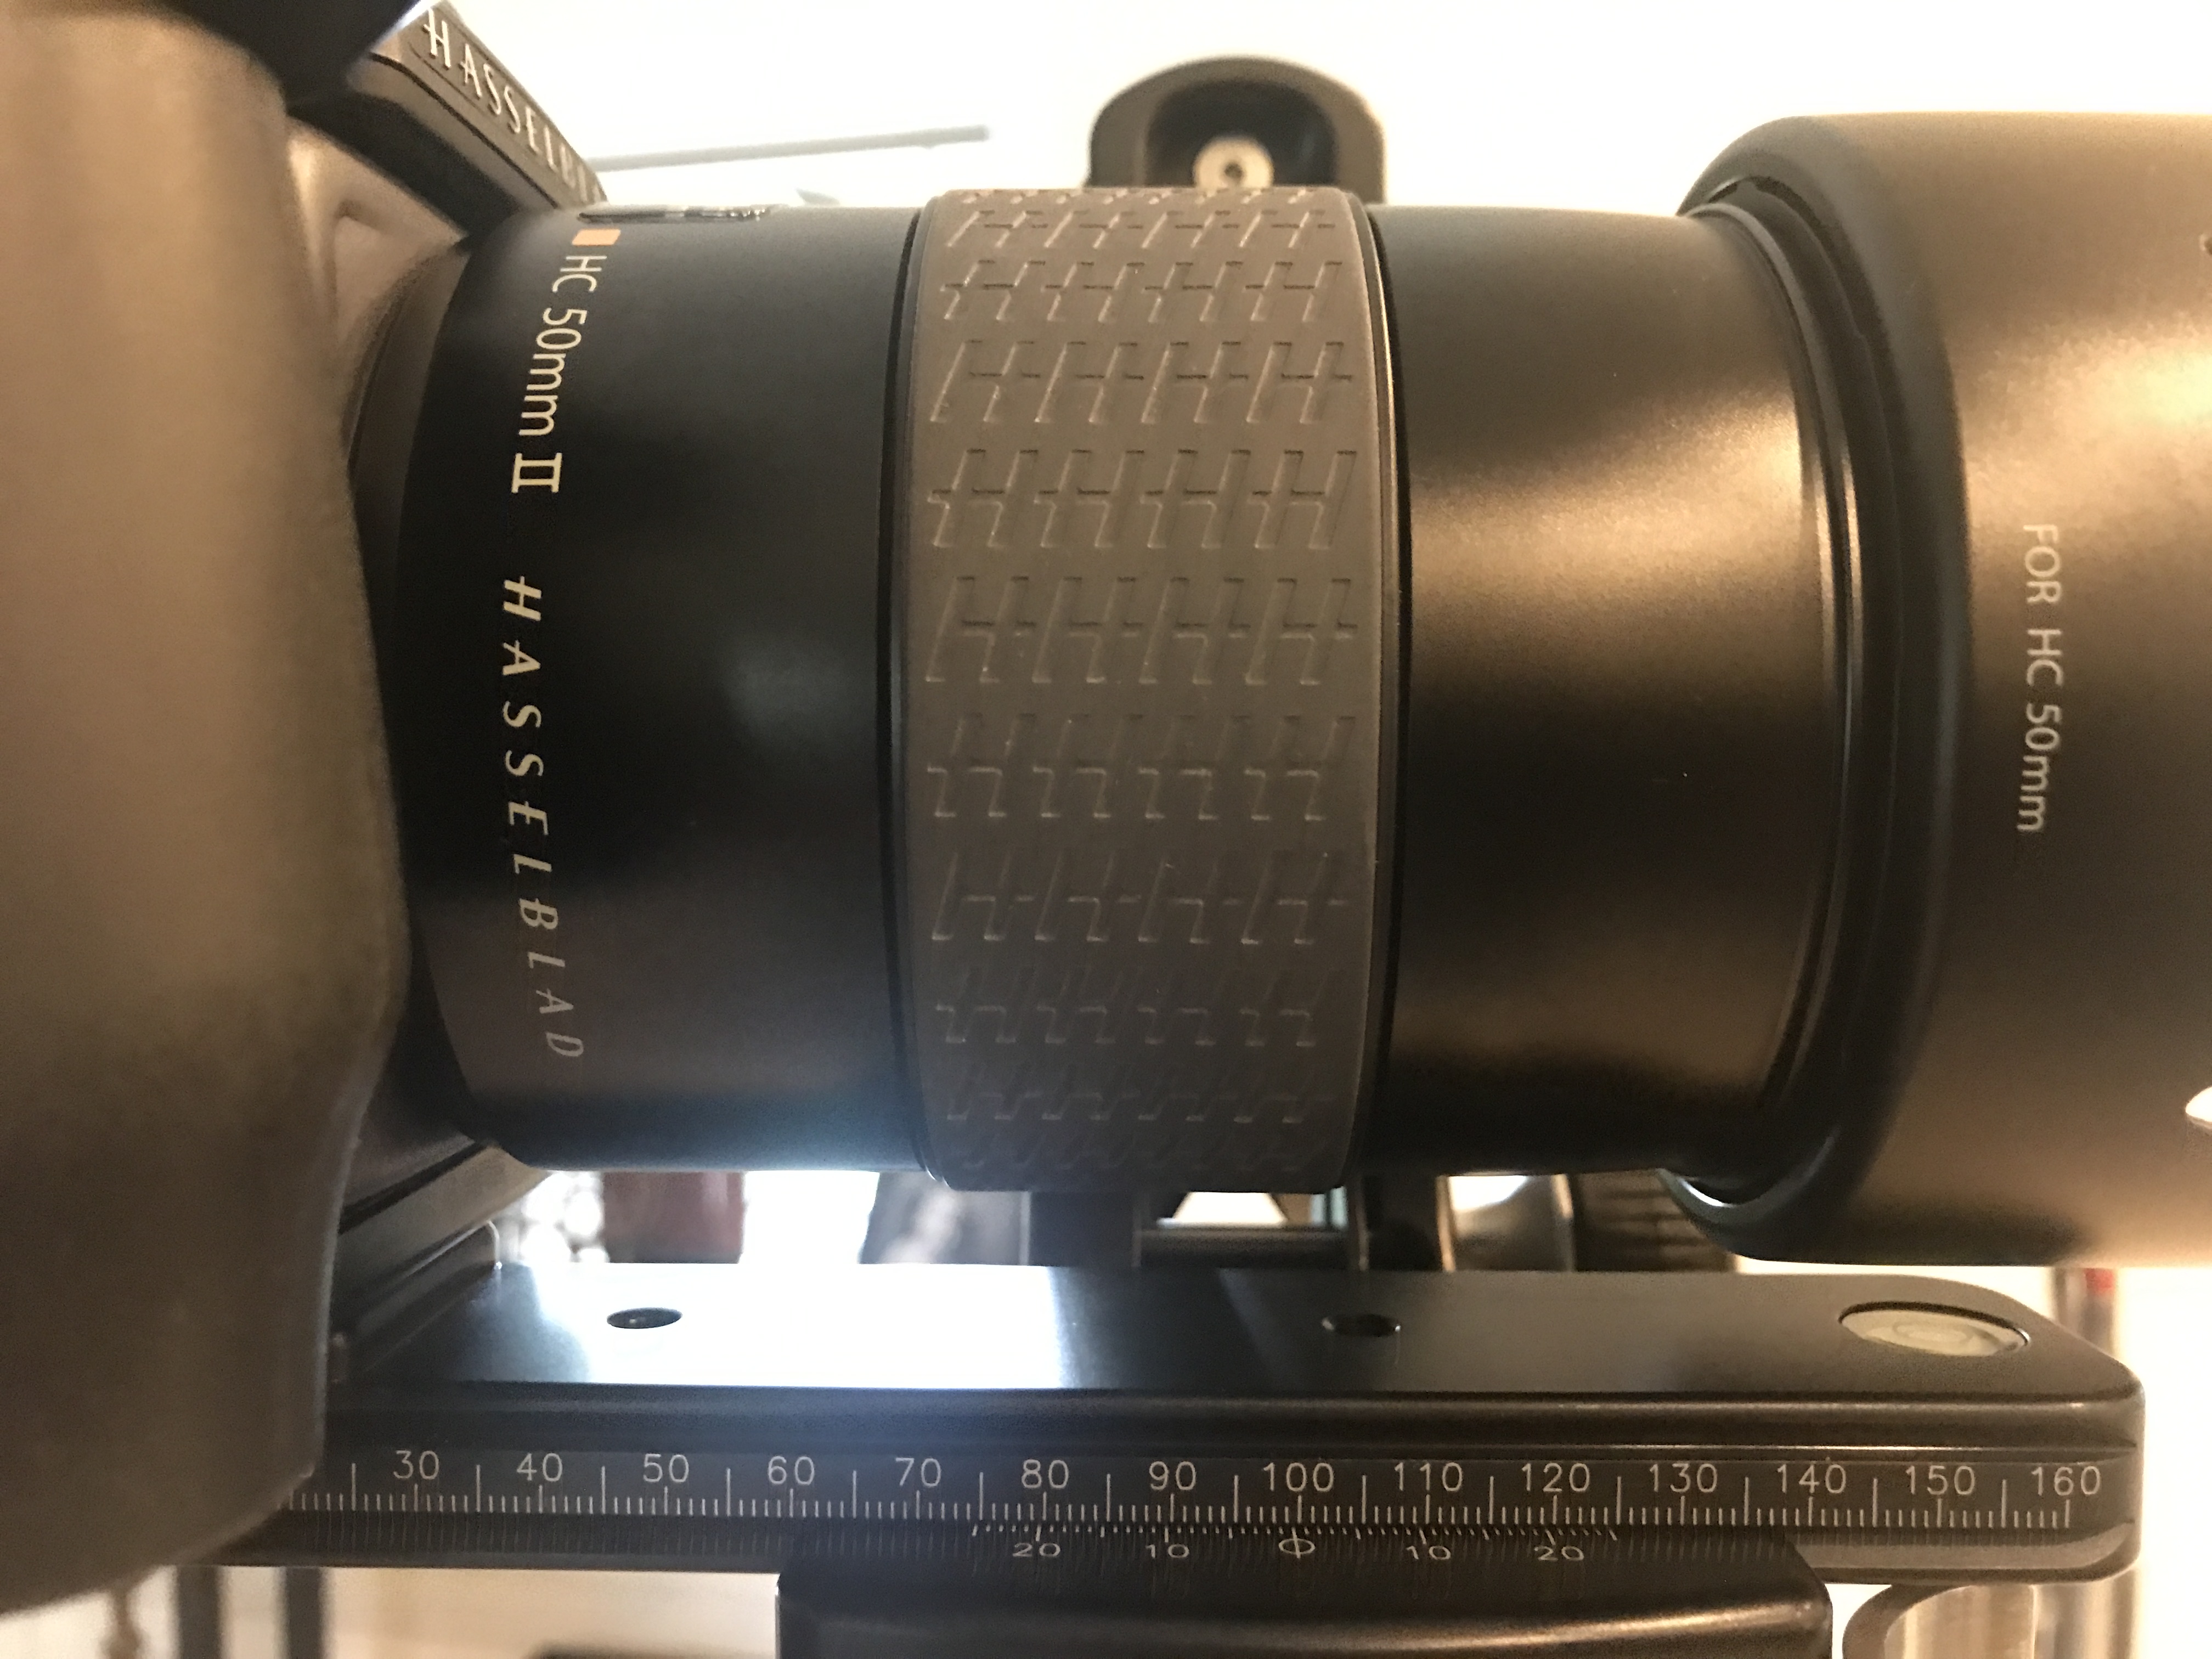
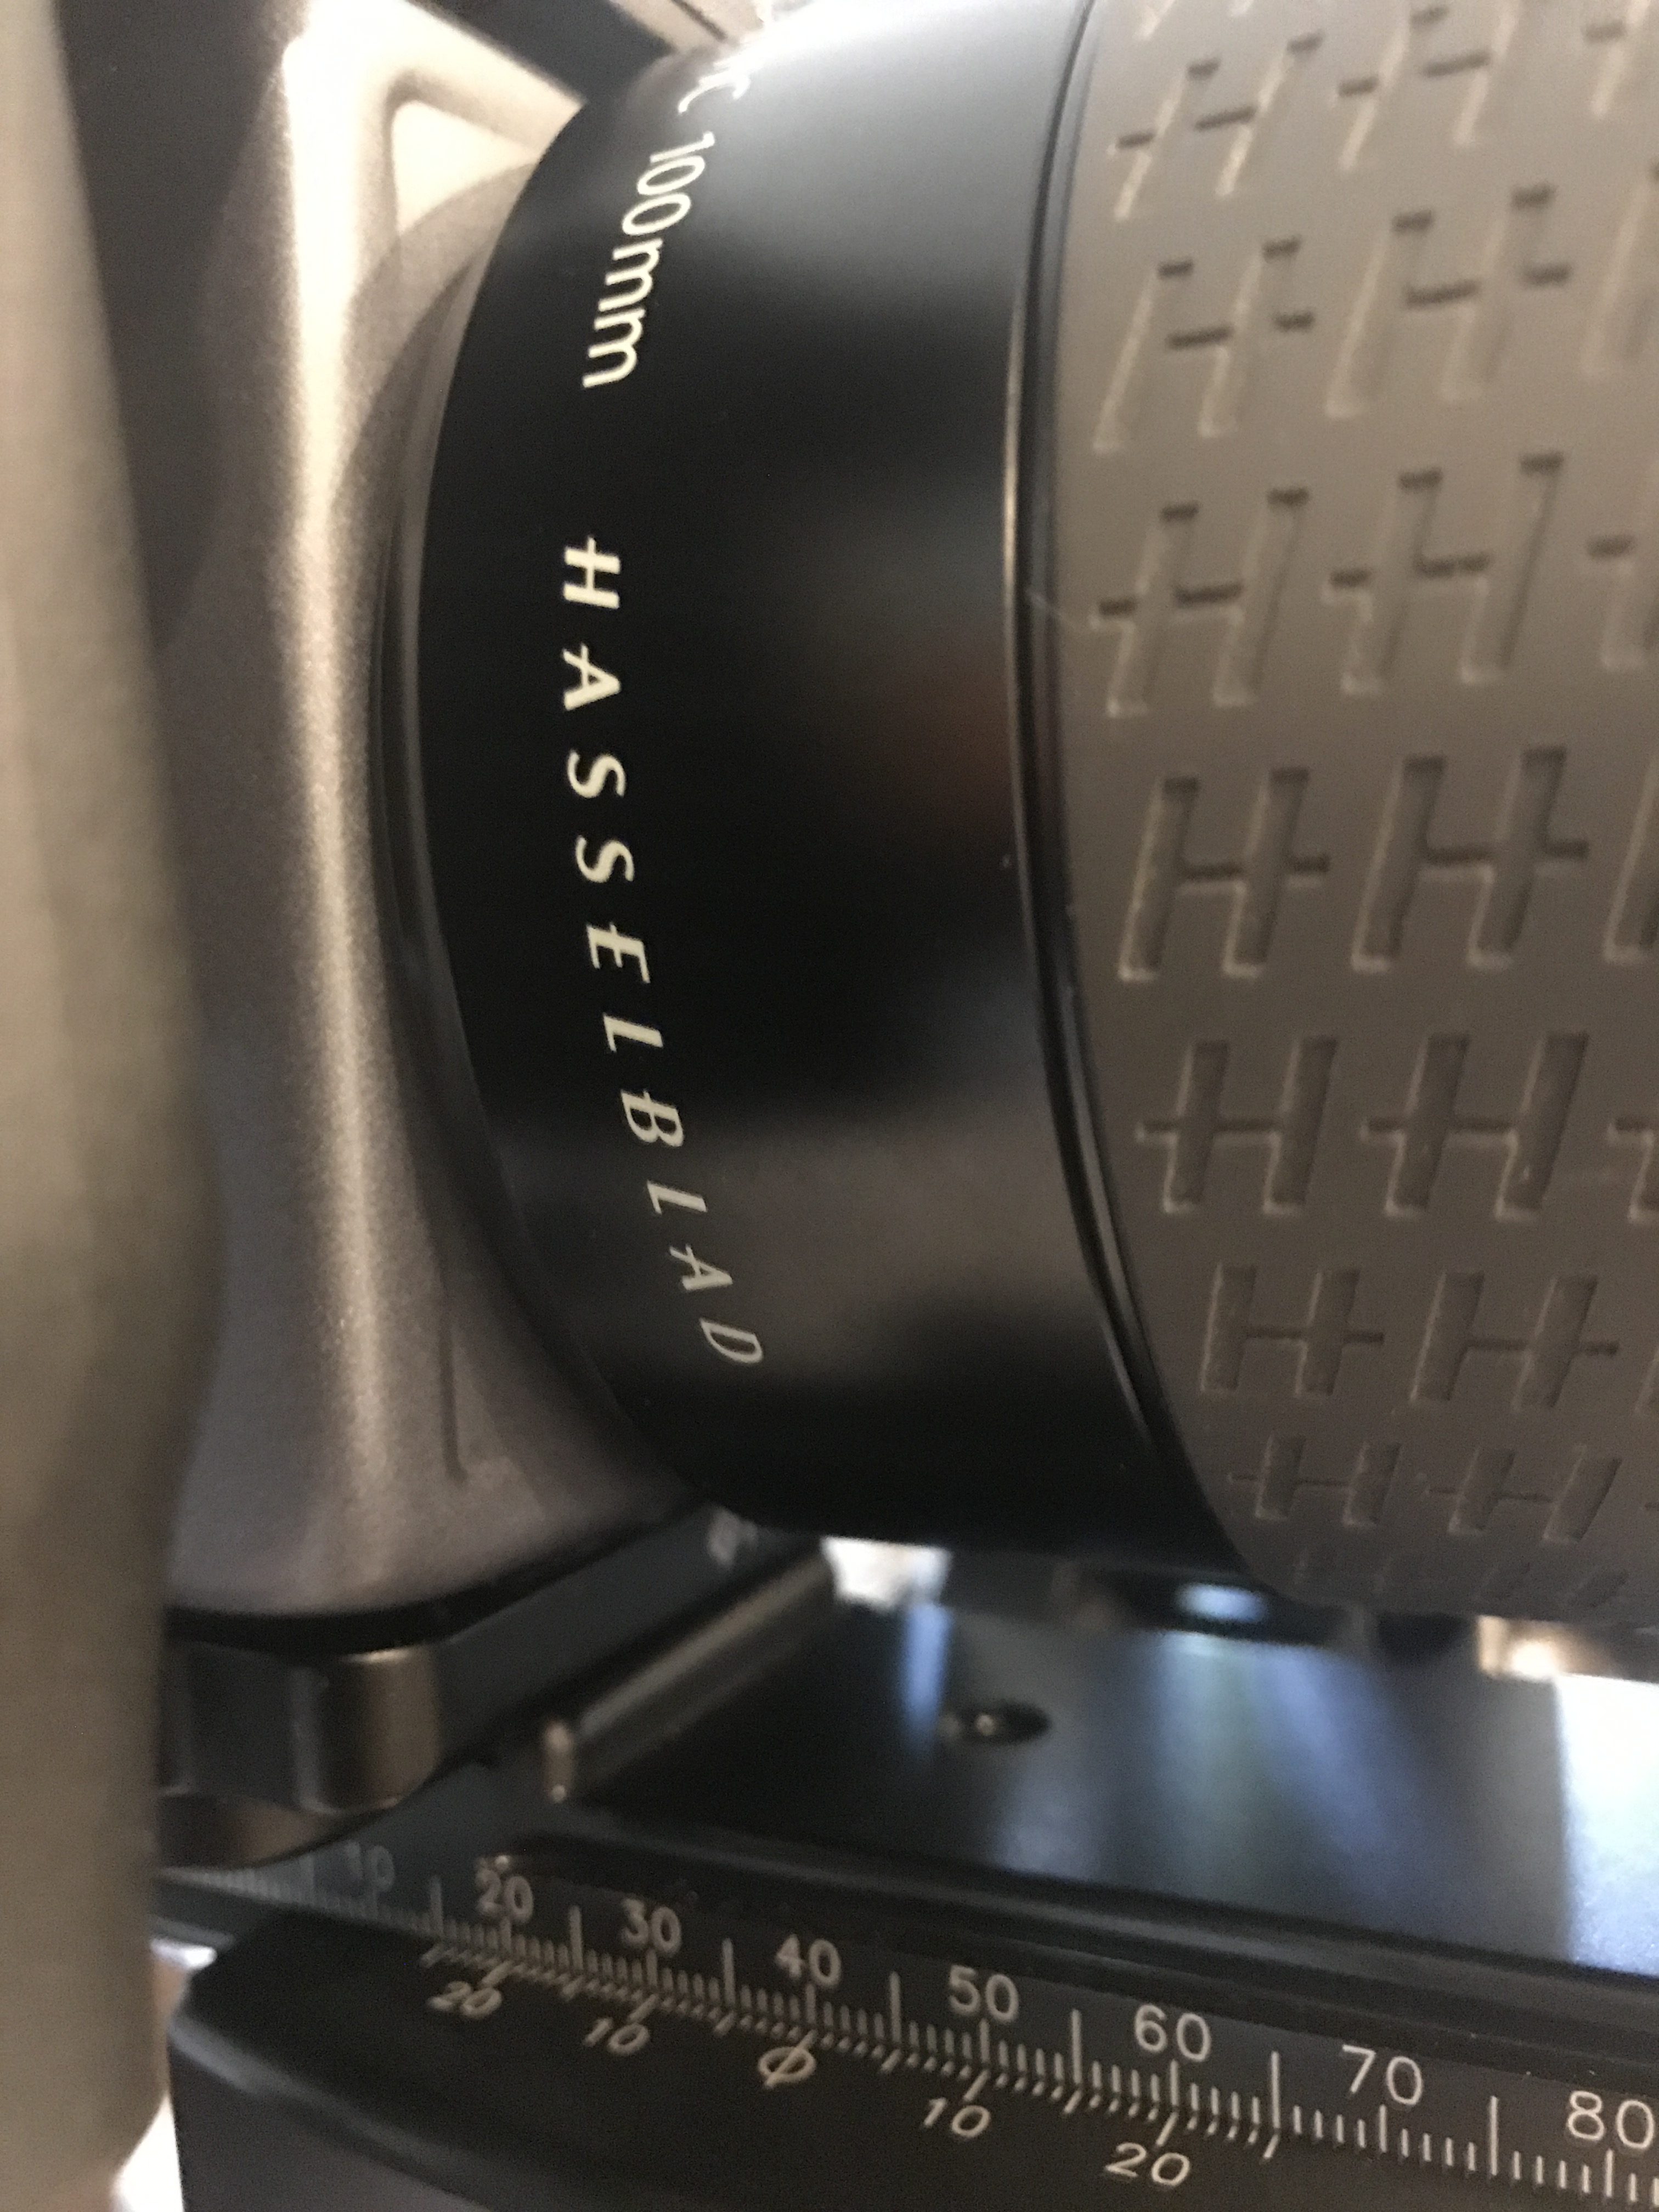
If you’re shooting a zoom lens the next thing you’ll discover is that the nodal point changes as the focal length changes. So I would start out zoomed all the way in or out and get that nodal point first and write it down or use the chart below as a starting point. I wrote down the nodal slider measurements for the marked focal lengths on the lens barrel.

Nikon Lens Nodal Point Measurements Lens Setting Nikon 24mm Tilt Shift f3.5 125mm Nikon 14-24mm f2.8 @14mm 135mm Nikon 14-24mm f2.8 @18mm 130mm Nikon 14-24mm f2.8 @20mm 127mm Nikon 14-24mm f2.8 @24mm 125mm Nikon 24-70mm f2.8 @24mm N/A without removing the slide stop screw Nikon 24-70mm f2.8 @28mm 152mm Nikon 24-70mmf2.8 @35mm 144mm Nikon 24-70mmf2.8 @50mm 133mm Nikon 24-70mmf2.8 @70mm 131mm Nikon 85mm f1.4 55 mm
Hasselblad Lens Nodal Point Measurements Lens Setting 100mm HC f3.2 40mm 50mm HC f2.2 99mm
Dale Watson – Austin’s Favorite Son
Dale Watson played to a nearly full-house at The Globe Theatre in Bertram, TX on Friday. His shows are not uncommon to Austin locals and he puts on a great show. Dale and his Lone Stars, have appeared on Letterman, Jimmy Kimmel Live, and The Grand Ole Opry but Dale has also been involved in several short movies and TV shows.
Dale Watson, keeper of the true country music flame, latest album Call Me Insane, was recorded in Austin with veteran producer Lloyd Maines (Robert Earl Keen, Jerry Jeff Walker, etc.). The Austin-based honky-tonker carries on in the tradition of Johnny Cash, Waylon Jennings and Willie Nelson with his “Ameripolitan” brand of American roots music.
Album highlights include “Jonesin’ For Jones,” a love song to the music of the legendary George Jones, “A Day At A Time,” about “getting by by barely getting by;” “Call Me Insane,” the album’s moody title track; “Bug Ya For Love,” a fun warning to all the single ladies, and “Mamas Don’t Let Your Cowboys Grow Up To Be Babies.” (Yes, it is an answer song to the Waylon Jennings/Willie Nelson hit.) “Crocodile Tears” is a tear-in-your-beer country song that sounds like an instant classic and “Burden Of The Cross” reveals Watson’s serious side.
Call Me Insane was recorded in Austin by Watson and his ace touring band, “His Lone Stars”: Don Pawlak (pedal steel), Mike Bernal (drums & percussion), and Chris Crepps (upright bass & background vocals). DaleWatson.com

Dale and His Lone Stars
")
 No Dale Watson show is complete without a plug for Lone Star Beer and few sips of the frosty beverage.
 Lone Star drummer Mike Bernal
.") Chris Crepps (upright bass & background vocals).
Chris Crepps (upright bass & background vocals).
 Don Pawlak (pedal steel)
 Dale Watson Backstage at The Globe.
After The Storm
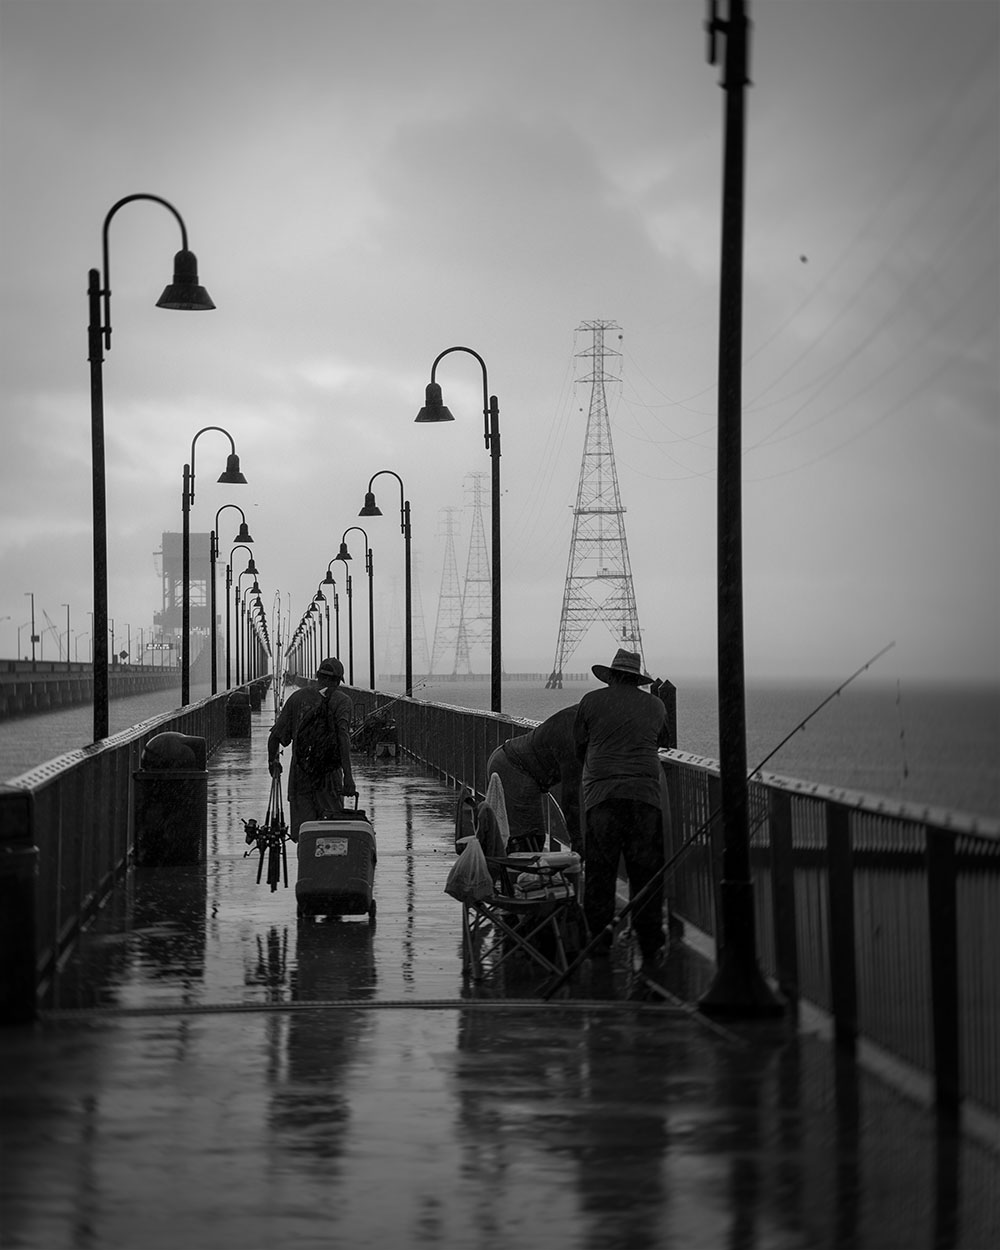
Sometimes you’re just drawn to things and I’ve always been drawn to the sea and fishing, among other things. This is the fishing pier on the James River in Newport News, VA. A summer thunderstorm had just passed and the dedicated fishermen scurried back out after the lightening passed to get their spot secured once again.
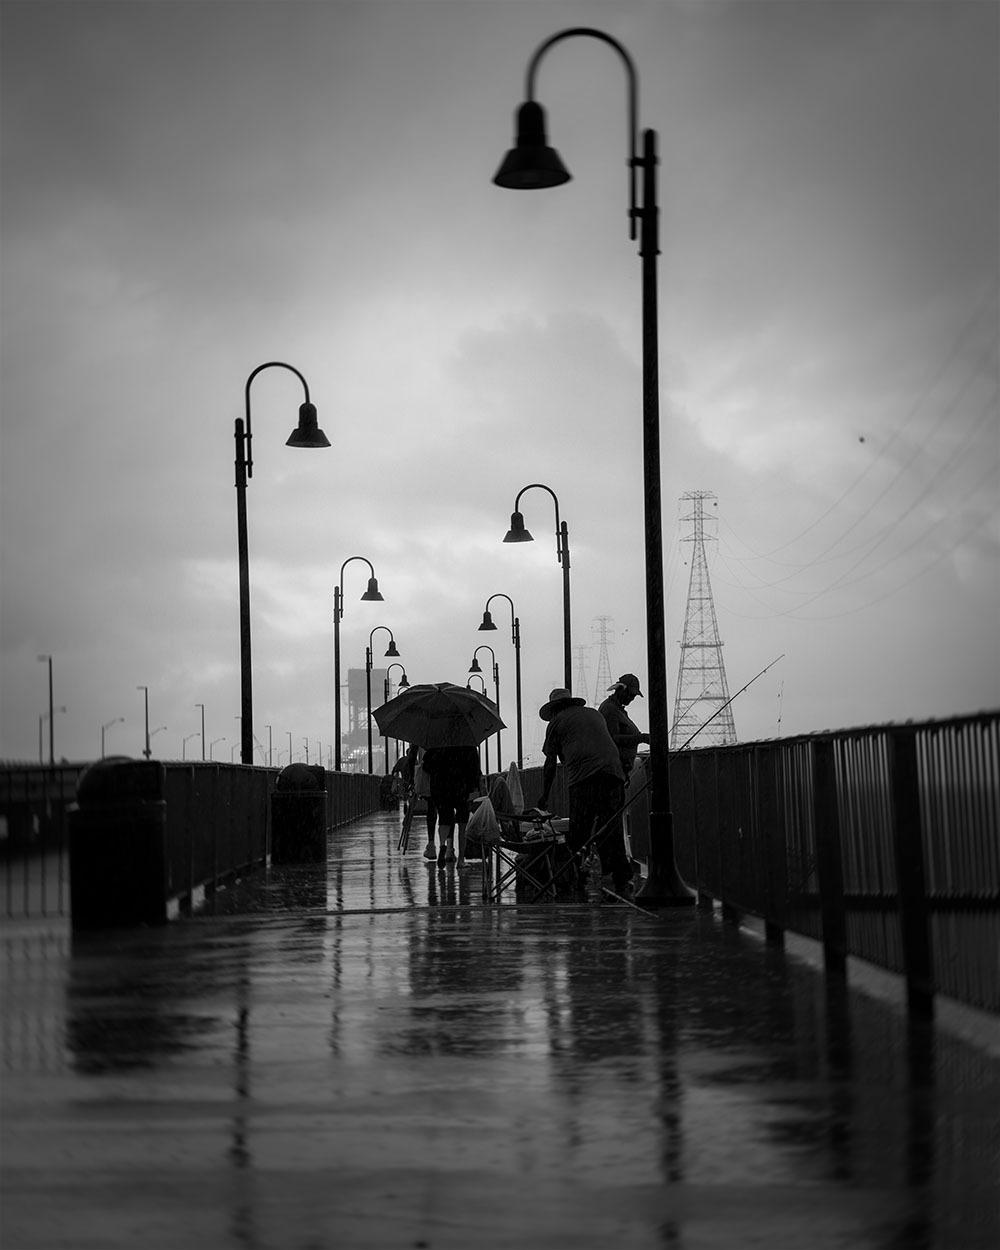
The catch of the day was croaker or “hard heads” as known by locals, but few keepers seemed to be had. Often a storm will trigger the bite so the fishermen were quick to return and did undoubtedly fish into the night under the lights of the pier. I was a bit jealous as I had to get on a plane early the next morning and head back to Texas, leaving my old stomping ground in good hands for the evening.
© Gary Smith 2018 All Rights Reserved